Showing posts with label beauty. Show all posts

Tuesday, October 7, 2014

Bold Smokey Eye & Red Lips

Hi there! Today's makeup is VERY dramatic and was oh so fun to create. I've been playing around with this look a lot, and finally decided to film a tutorial to go along with it. If this look is too bold for you, try out a nude lip...I absolutely LOVE the combo. Let me know if you would rock bold eyes AND lips in the comments below. 


Products Used:
(Items in blue can be clicked on to view product)
Lorac 2 Palette "Lt Brown" "Cool Gray" "Black"
NYX Concealer in a Jar
Urban Decay Naked Palette "Virgin"
L'Oreal Miss Manga Mascara
Ardell Demi Wispies 
Urban Decay Naked Flushed Palette
Mac Cream Blush "Ladylike"
Nars Lipliner "Jungle Red"
YSL Rouge Lipstick #17


How-To Video Tutorial:


Thursday, September 25, 2014

Brown Nudes for Fall

Hello! Today's makeup look is another wearable, everyday fall look. I love looks that can be wearable, but stay tuned for some fun colorful fall looks soon! 


Get the Look

-For my eyes, I played around with a lot of different eyeshadows to create this look. I mainly pulled from the purple toned colors from my Laura Mercier Artist's Eyeshadow palette. This was limited edition last Christmas, but any steel/purple colors will work. The BH Cosmetics Day to Night palette also has very similar shades.
-I used my Milani Liquif'eye Eyeliner on my upper lash line and water line and smudged it out.
-I applied mascara to my upper and lower lashes using L'Oreal Telescopic and then applied Andrea Accent Lashes ( I just got a 4 pack for $3 off Amazon and LOVE them).
-For my lips, I actually mixed a bit of lavender lipstick with a brown nude lipstick to tie into my eyes! 
-Last but not least, we can't forget blush! I used my Coastal Scents Blush Palette and mixed together a lavender and matte neutral brown.

Wednesday, September 24, 2014

Bold Lips for Fall

I cannot believe yesterday rung in the first day of fall! Wasn't it just summer? I'm not complaining though, because I can definitely use a break from this Florida heat. In honor of the start of fall, I decided to bust out my dark lipstick today!


I wasn't sure which set of pictures I liked better, so I added both! Let me know what you think.


Get the Look:

-I started out by gently dusting a shimmery gold eyeshadow across my lid. (I used the gold color in my Too Faced Chocolate Bar palette).
-Ever so lightly, I used the shade "Naked" from my Naked Palette which is a light, matte brown, in the outer-v of my eye and blended it out. I wanted it to almost appear as my natural crease.
-I dusted the gold and matte brown under my lower lash line. 
-Then, I created a cat eye, added little "flare" lashes--basically false eyelashes that only go in the outer corner. I would really recommend using these if your lashes need a little umph but you find putting on regular lashes too time consuming.
-For my lips I used Revlon's Black Cherry, which is a deep berry color.

Thursday, September 18, 2014

Bold Lashes, Liner, With a Soft Cat Eye

I love everyday, wearable looks and today I have another to share with you. I opted for bold liner (although the cat eye is very subtle and soft) and bold lashes. Anytime I wear bold liner, I think its a MUST to have some big, bold lashes to go with it--otherwise, they tend to disappear. To tone down the liner, I kept the rest of my eye very neutral. Read below for a step-by-step tutorial!


Get the Look:

- Apply a matte bronzer or medium brown shade to your crease.
-Add a neutral, cream shade to your lid. 
-Use a highlight under your brow bone with a bit of shimmer to glam up this look. 
-I lined both waterlines with the new Laura Mercier TIghline Cake Liner since it really stays on without smudging. I also used this to create a soft cat eye by very lightly applying it.
-I mixed a bit of black and matte brown eyeshadow and smudged it under my lower lash line.
-Finished off the look with some falsies, I used the Ardell Demi Wispies

Wednesday, September 17, 2014

Lorac Pro 2 Palette Smokey Eye

Hi ladies! With fall right around the corner, I've been loving simple smokey eyes lately. To jazz this up a bit, I used a bit of shimmer on the lid today! I don't have a video tutorial up for this one yet, but let me know if you'd be interested in seeing one.


Get the look:
-Apply an eyeshadow primer on your lid 

-Using my Lorac Pro 2 Palette and a crease brush, I applied "Light Brown" and "Cool Gray" to my crease".

-Mixing together a bit of "Mocha" and "Chrome", I applied this to my lid and under my lower lash line.

-Finished this look off with a simple cat eye, apply a bit of mascara, and I chose to use some false eyelashes from Ardell (Demi Wispies).

**When I take pictures of my makeup, I tend to use false eyelashes to make them stand out more! If you're going for a casual look, you can choose to forgo them!


Friday, June 6, 2014

Vegan Cuts Beauty Box: May 2014 Unboxing

Hello there! I have been loving subscription boxes lately, and today I'll be unboxing my May Vegan Cuts box for you. Now Vegan Cuts has two separate boxes, one catered towards food and the other beauty (which is the one I have today). Let's take a look!


The Subscription Box: Vegan Cuts 

The Cost: $19.95

The Products: 4-7 products that are 100% cruelty free and mostly organic and natural!


This month, I received six products and I would consider four of them very well sized. Let's take a further look!


 Gourmet Body Treats Finishing Powder: FULL SIZE ($25) Now, I don't think I would pay $25 for this powder if it wasn't in this box simply because only about 1/3 of the jar is full. I've never seen a powder quite this empty. However, for being in a subscription box, this is a really good size product that I will definitely be using. 

Skinagain Vanish Lotion: FULL SIZE ($52) WOW! Another full sized product?! And a high-end one at that. This is great for any skin type and I'm actually really excited to try this out. Normally, I don't go out and spend this much on my own for a skincare product, so I'm glad it was in this box.

Sevi Blue Yarrow Sea Salt Texturizer: 2.15 oz ($4) I'm obsessed with salt sprays, especially now that it is summer time and I'm always at the beach. This isn't a full-sized product but it is a really good amount!

Lauren Brooke Cosmetiques Lash Strengthening Mascara:Travel Size ($9) This little mascara is adorable and perfect to take with you on the go!


Tallulah Jane Natural Perfume Vial: ($2) This little perfume smells great! 

Goddess Garden Organics Sunny Body SPF 30 Sunscreen: (Sample) I'm not a big fan of "foil packets" because I rarely use them and in this case, I already have lots of other sunblocks. 

Box Cost: $19.95
Box is Worth: $92

This was my first month trying out Vegan Cuts and WOW! The value was phenomenal and I can actually say that I'll be using every item I received (with the exception of the sunblock, I'm sure). This is great for beauty lovers like myself who are also against animal cruelty. Have you tried Vegan Cuts before? Let me know in the comments below!

Thursday, March 20, 2014

Pomegranate Punk Makeup Look

Today I was feeling a bit daring. I went for this bold mahogany or "pomegranate" color. On my lid I used the Maybelline Color Tattoo in Pomegranate Punk; I absolutely LOVE the color tattoos and have for a very long time. I applied the red rusty color over top of it to set it. Then, I applied "Naked" from my Urban Decay Naked Palette, which is a matte brown, in my crease. Normally, I don't go for a red look on my eyes but I actually really like how this came out. What do you think??


Wednesday, March 19, 2014

Ipsy Box March 2014

Ipsy is a monthly beauty and makeup subscription box. Each month you get full size or deluxe-sized products, plus a cute makeup bag. This is my first month subscribing to them so let's take a look at what I received!


The Subscription Box: Ipsy 
The Cost: $10 a month (free shipping)
The Products: Full size and samples of makeup and beauty products. (Plus a makeup bag!)
Ships to: US and Canada


Marvelous Moxie Lipstick in "Get Ready": 1.5g ($7.50) I love Bare Minerals so I am really excited to try out their lipstick. I normally go for more bold colors and looking out their website, this lipstick comes in so many fun colors, I wish I would have gotten a different color to play around with. 

Be a Bombshell "Bora Bora" Eyeshadow Quad: ($16) Full sized eyeshadow? Yes, please! I haven't tried the Be a Bombshell brand yet so I'll have to let you all know what I think. As for the colors themselves, they are really bright and seem to be pigmented well. However, I don't think these colors really go well together to complete a full look.


Nicole by OPI Roughles "On What Grounds": 0.5g ($7.99): I love getting a full sized nail polish! Especially from OPI. I love this color (it reminds me of those chocolate easter eggs with flecks of color in them). However, I am not loving the texture. I'm not a fan of textured nail polish, even though I painted my nails well, it looks as if I bumped into a million things before they dried. 

Pixi Beauty Flawless Beauty Primer: 12ml ($3.60):  Again, another product I've never tried and I'm really excited to try out a face primer because I currently do not use one!


 Cost of box: $10
Value of my box: $35.09 + makeup bag

Great value and LOVE the size of the products. I definitely cannot wait for next months :)


Tuesday, March 18, 2014

Classic Smokey Eye Makeup Tutorial

Hello again! Todays look is the classic smokey eye! I have a video tutorial going up on this soon so stay tuned. This look is quite simple, just requires a lot of blending. On the lid, I used a Coastal Scents Silver Glitter Pigment and set it with a white/cream color from my Ben Nye Palette. In the outer corner, I used a range a light gray to black starting with the lightest gray and blending in the darker colors as I went.

Sunday, March 16, 2014

Navy & Teal Eyeshadow Look


Hi there! Today's makeup is a dramatic blue smokey eye. All the eyeshadows I used were from my BH Cosmetics Day to Night palette. This palette is amazing for playing around with colors. I used a bright navy on the lid, a muted blue and gray in the crease, black in the outer corner and teal on my lower lash line. I completed the look with Ardell false lashes and some black eyeliner. I had so much fun creating this look and loved how it came out, but it might be a bit too crazy for me to wear out at night--what do you think? Let me know!


Saturday, March 15, 2014

Romantic Smokey Eye with Pop of Color


Todays makeup incorporates some color! All the colors shown are from my BH Cosmetics "Day to Night" palette. A gold/beige on the lid, pink in the crease, and purples in the outer corner and lower lash line. I used a purple liner from Urban Decay and Ardell 'natural' false lashes. Feel free to draw inspiration from this look and use whatever eyeshadow colors you already have! 

xo,
Courtney


Thursday, March 13, 2014

Dark Cat-Eye With Neutral Eyes

I hope you all are having a wonderful day so far! Here is my makeup look today. I really love this one and  may do a video tutorial soon to accompany it. For my eyeshadow, I kept it simple with my Lorac Pro Palette ("Cream" on the lid, "Taupe" in the crease, "Nude" as a highlight). And then used a combination of liquid liner (L'Oreal Telescopic) and pencil liner (Urban Decay 24/7 Glide On).


Wednesday, March 12, 2014

Gold Liner Eye Makeup

Todays makeup is a neutral eye with a pop of gold liner. I recently picked up this Covergirl Flamed Out  Shadow Pencil in "Gold Flame"and decided to have a little fun with it while keeping it natural. On the lids I used my Urban Decay Naked Palette "Sin" and a touch of "Half Baked" on top. In the crease I used "Buck".


Quick, Natural Makeup (Naked 2 Palette)

I've decided to start blogging my daily makeup looks (on the days I actually wear makeup that is…) and here is a look I wore yesterday. Its very simple, neutral and uses only shadows from the Urban Decay Naked 2 Palette. If I have a video tutorial to accompany the look I will be sure to include it!


Saturday, March 1, 2014

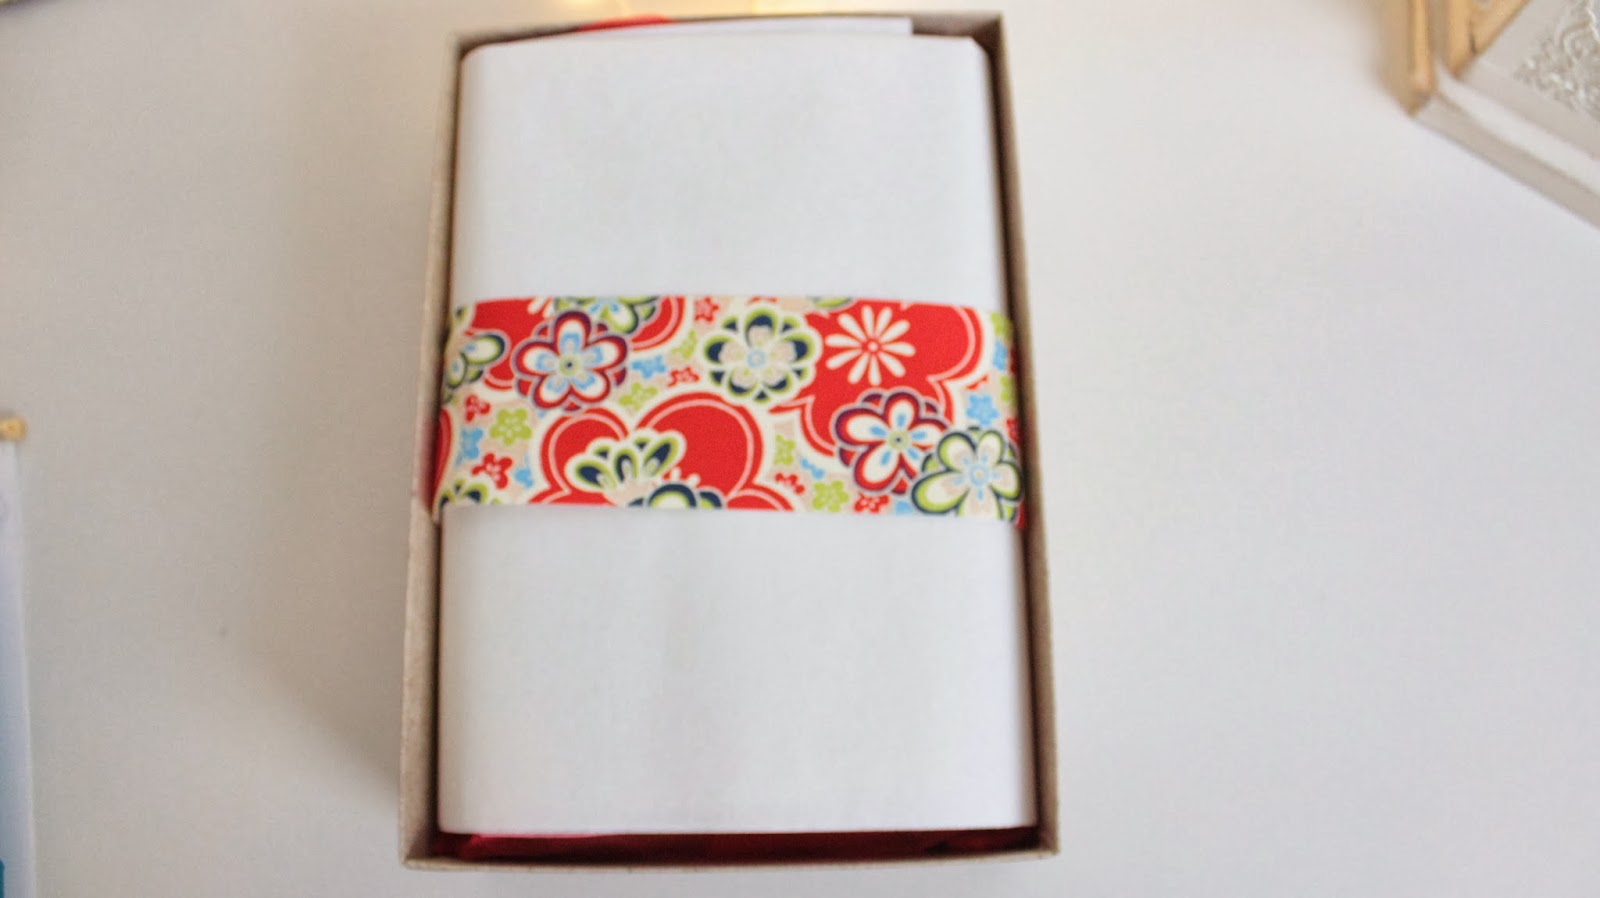
Yuzen Box: Spring 2014 Edition

Hello! Today I have another subscription box unboxing / review for you. I've been loving subscription boxes lately and this is definitely one of my favorites! Here is what I received in the Spring 2014 subscription (blue) box.  


The Subscription Box: Yuzen
The Cost: $33 a quarter
The Products: Eco-friendly products to nourish the body and soul


Even the packaging is gorgeous! 


Sumbody Bathmelt – Value $5.50
Sumbody Sum Fizzer – Value $5.95
I'm weird when it comes to baths--I believe the last time I took one, I was about six. I might actually have to overcome my "fears" and take a bath soon (bring out the bleach!) thanks to these awesome products I want to try. 


Balanced Guru Body Balm – 1 oz Value $12
Something for your face, hands, and body. Both hand and body cream are very moisturizing. I love how this box gives you a little bit of everything and not just five hand creams...


A little nervous to try this. Love dark chocolate..cherries, not so much. 

Cost of Box: $33
Total Value: $59.45

Final Thoughts: If you're looking to treat yourself to a spa day, this is the perfect box for you! High end products, fantastic sample sizes, and beautiful packaging. My favorite thing is that you are always guaranteed a box valued over $50, so you don't have to worry about getting your moneys-worth!

Thursday, February 20, 2014

Pijon Box: Winter Edition

Pijon Box is a monthly subscription care-package box for college students. Each box usually includes some essential basics, plus some other fun or healthy items you might hope to find in a care package! Here is what's in my Pijon Box: Winter Edition!


The Cost: $29 a month or $25 a month with 6-month subscription.
The Products: 5-6 products in the following categories: food and snacks, health and beauty, essentials, and awesome accessories and gadgets.


Frava Naturally Caffeinated Juice: $2.99 Mine was in the flavor Peach-Mango and I'm still a little nervous to try it because I'm not a big mango fan at all.


Vapur Reflex Foldable Waterbottle: $7.99 loved getting this because I needed another water bottle. All of my other ones I left back at home. 

SmartyPants On the Go Vitamins:  $5.99 (for a four pack). This is kinda pricy for vitamins, so I don't think I'd buy these but they were nice to try. Tasted sweet like a gummy and only a mild taste of vitamin.

JimmyBar, Vegan, Gluten-Free, All-Natural Granola Bar: $2.49 I got the peanut butter and apple flavors. Let me tell you what, these were hands down the star of the box for me. I LOVE THEM! I originally thought they were going to be crunchy, but they were chewy--even better. You can actually read all the ingredients in them, they kept me full, and they are DELICIOUS. I was worried about not liking the apple flavored one, but I was very pleasantly surprised. 

Richer Poorer Premium Socks: $11.99 I am so happy with the color I got! Adorable.


 Girls Can Tell Notebook: $9.99 Not impressed, even considering that it is made from recycled paper. Not quite sure who would pay nearly $10 for this, especially since it only has around 20 pages... with weird squares…

Total Value: $41.44
Cost of Box: $29

Overall, I definitely got my moneys worth in this Pijon Box. I got a little bit of everything which I love, and this would be a great care package gift from my parents. Even if you don't subscribe to this box, go try a JimmyBar--seriously, go. 

Enter for a chance to win a 3 month subscription of PijonBox:
http://www.pijonbox.com/land/spreadinsunshine15

*Ends 3/10/2014 at 11:59pm


Sunday, February 16, 2014

Whitening Lightning Lipgloss Review

Hi ladies! Lately I've been trying out these three lip glosses from Whitening Lightning and I thought I'd share with you what I thought about them. These lip glosses are supposed to increase lip volume, reduce lip wrinkles and be super moisturizing; lets put them to the test! 


As far as increasing lip volume, they do not have that tingling sensation that a lot of lip plumpers do--which is a very good thing! However, I haven't noticed my lips looking any bigger (though I do have a large bottom lip to start with..). By "decreasing lip wrinkles" I think it merely means that when you apply these lip glosses they do not settle into your fine lines--instead, they make your lips appear seamless. I do not think they actually 'get rid' of wrinkles, but they are very moisturizing and look great. Did I mention how incredibly pigmented they are? LOVE that! Very impressed when I see a lip gloss with this much pigmentation.
The three colors I have here are Nude, Salmon and Fiji.

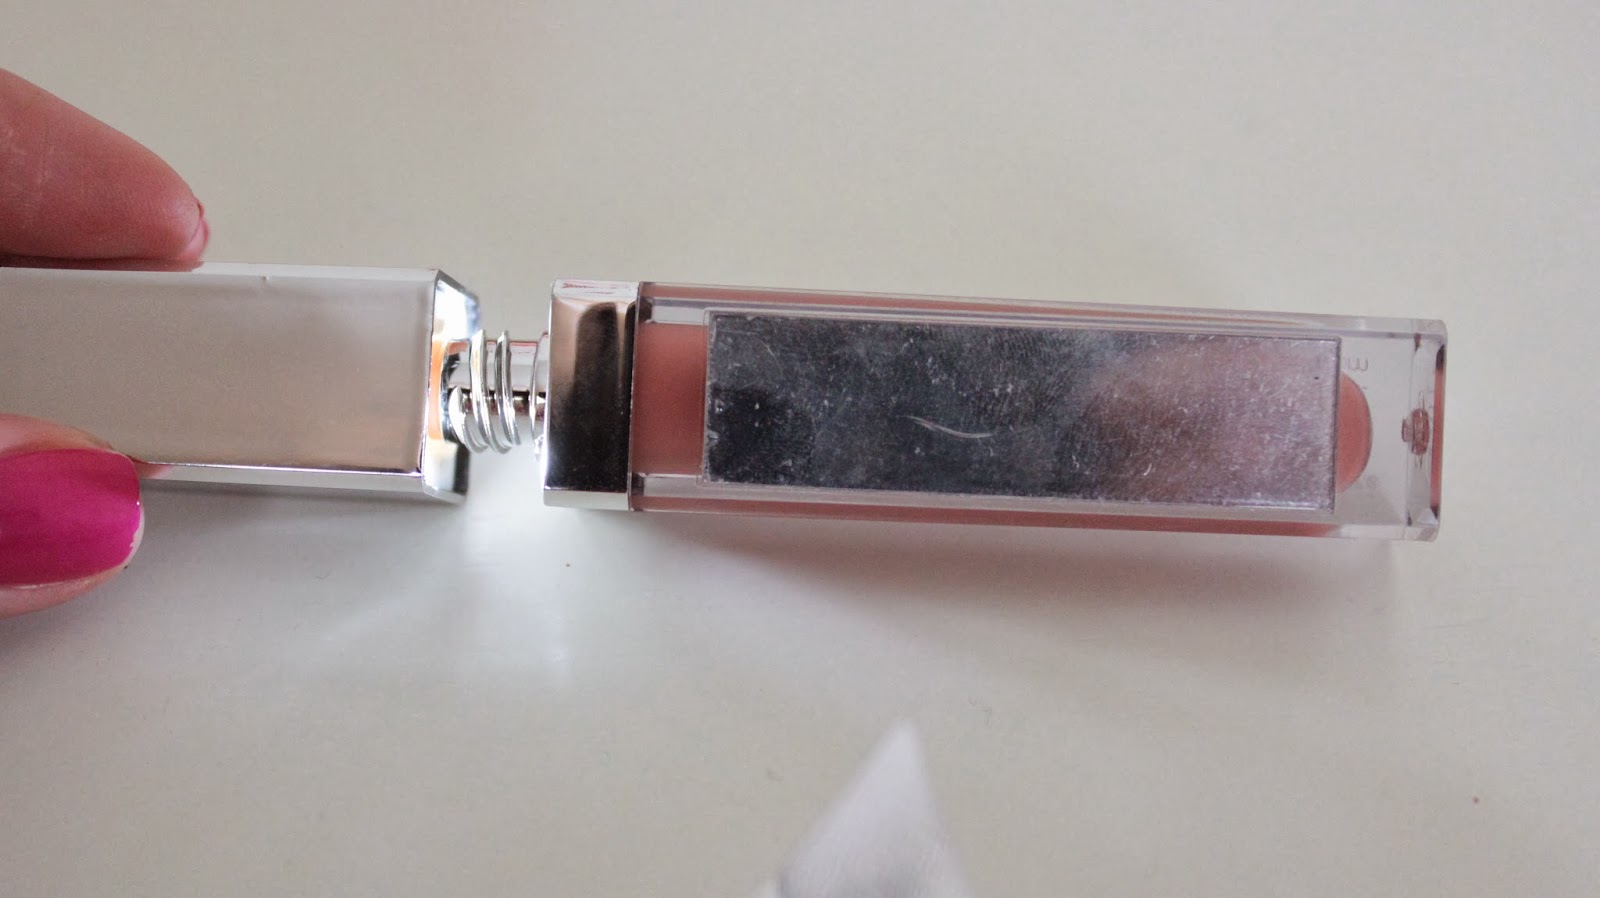
I also, love the packaging. I have never seen a lip gloss with a built-in light! HOW COOL! It also comes with a little mirror on the side. Now lets take a look at how they actually look ON the lips, because I think that's the most important thing. 

"Nude" is most definitely by favorite. A perfect nude color is so classic and matches any makeup look.


With "Fiji", you can really see how pigmented these lip glosses are. I mean, how many light pink lip glosses actually LOOK light pink? I'm going to love wearing this one come summer time. 


 Last but not least, is "Salmon". I saved it for last because its my least favorite of the three. Normally, I don't go for lipsticks or glosses with an orange tint. As you can see, I feel it brings out the yellow in my teeth, which is something nobody wants!


Overall, I would definitely recommend these lip glosses! Now, they do retail for $38 which is quite expensive for a lipgloss. It better be darn near perfect for almost forty dollars. Time to celebrate-- I have a 70% off code for you all (WhiteningLightning always have awesome combo deals too)! It's good for anything on their website. All you have to do is use code Sunshine at checkout. ENJOY!


Sunday, December 15, 2013

DIY Bath Bombs / Fizzies

After my DIY: Scented Bath Salts post and video, it was highly requested for me to do a DIY Bath Bomb tutorial! This takes more time, and is a little more messy...but a fun project! If you make the two projects together, it makes a great gift set for the holidays.


Supplies:
  • 2 Cups Baking Soda
  • 1 Cup Citric Acid
  • I Cup Cornstarch 
  • 2 TBSP Extra Light Olive Oil
  • 10 drops Essential Oil
  • Spray Bottle
  • Water or Witch Hazel
  • Food coloring / Soap coloring 
  • Twine
  • Jar or recycled candle jar
  • Cardstock / Tag
  • Dried Herbs / Sea Salt (Optional)
  • Silicone Ice Tray / Cookie Cutters 
  • Bamboon Spoons (I got mine here)
Directions:
  • Combine dry ingredients in a bowl (baking soda, citric acid, cornstarch)
  • Add in extra light olive oil; mix. Add essential oil.
  • Combine water and a few drops of food coloring in a spray bottle.
  • SLOWLY start to spray mixture into the bowl, mixing as you spray. If you add too much water, it will start to fizz and expand so do this step slowly.
  • Keep adding water until it is a wet-sand-like consistently (Just wet enough that the sand will stick together.)
  • Pack mixture into a silicone ice tray. If you want to make a perfect square-shape, use a butter knife to scrape across the top. 
  • Let sit in the mold for about two minutes.
  • Pop out of mold and let them dry overnight.

Yields:
  The measurements I used, with the tray size I used, makes between 50-60 small cubes which filled two large jars.

Video Tutorial:


Wednesday, December 11, 2013

DIY: Scented Bath Salts

What better gift for that special woman in your life (or yourself) than bath salts?! Homemade bath salts are fun to make and will save your wallet at the same time! If you all enjoy this simple DIY let me know if you'd like to see DIY Bath Bombs too. Here is the little cute jar I made:


Supplies:

Dry Ingredients: 
1 1/2 Cup Epsom Salt
1/2 Cup Sea Salt (This is optional, but adds some different texture)
1/4 Cup Baking Soda

Wet Ingredients: 
10 drops of Essential Oil (More or less based on how strong you want it)
2-8 drops of food coloring/soap coloring

Optional Decoration Pieces:
Twine
Tag / Cardstock
Jar with lid (This is a recycled candle jar)
Small spoon (I got these cute bamboo ones here).

Directions

  • Mix together all dry ingredients in a bowl. 
  • Add a few drops of food coloring at a time and mix until you reach desired color.
  • Add about 10 drops of essential oil. There are really cool lists online that show you what each oil does for you. Some help allergies, keep you focused, relaxed, etc.
  • Spoon into jar.
  • Create tag and wrap with twine.
  • ENJOY!

Yields:
The above measurements were enough to fill one large jar. Use smaller jars or bottles for the perfect gift!


If you'd like to see this DIY in video form, watch here:


Thursday, November 21, 2013

Get The Look: Lorac Pro Palette Dupes


Hi guys! Today I filmed one of my favorite and most-requested makeup tutorials! Every time I wear this in a video I get so many compliments and requests--so voila, here it is:


Now to achieve this look, I use my Lorac Pro Palette. But that would be a bummer for all of you who want to get this look and don't have this palette. DUN-DUN-DA! I'm here to the rescue. I've put together some drugstore dupes for you that will get you this same look. Some of them aren't identical, but fit the same color scheme and are pretty darn close.


Top: "Champagne" from the Lorac palette. Light glittery pink.


Bottom: Covergirl "Sheerly Nudes" quad, second color from the right. Not quite as pigmented but definitely close.


 Top: "Mauve" Lorac palette. Matte color.

 Middle: Wet N' Wild "Silent Treatment" bottom color of the trio. Gorgeous mauve color with shimmer.

Bottom: "Tease" Naked 2 palette. Deep mauve matte color.  


 Top: "Pewter" Lorac Pro Palette. Really a unique purple-y brown color.

Middle: Maybelline Stylish Smokes Quad "Lavender Smokes" Bottom liner color. More purple than Pewter but will fit nice with this look.

Bottom: Maybelline Modern Metallics Quad. "Sunlit Bronze" Bottom liner color. Almost perfect match just a little less brown.


Are you ready to try this look out for yourself? Click here for a video tutorial: