Thursday, November 21, 2013

Get The Look: Lorac Pro Palette Dupes


Hi guys! Today I filmed one of my favorite and most-requested makeup tutorials! Every time I wear this in a video I get so many compliments and requests--so voila, here it is:


Now to achieve this look, I use my Lorac Pro Palette. But that would be a bummer for all of you who want to get this look and don't have this palette. DUN-DUN-DA! I'm here to the rescue. I've put together some drugstore dupes for you that will get you this same look. Some of them aren't identical, but fit the same color scheme and are pretty darn close.


Top: "Champagne" from the Lorac palette. Light glittery pink.


Bottom: Covergirl "Sheerly Nudes" quad, second color from the right. Not quite as pigmented but definitely close.


 Top: "Mauve" Lorac palette. Matte color.

 Middle: Wet N' Wild "Silent Treatment" bottom color of the trio. Gorgeous mauve color with shimmer.

Bottom: "Tease" Naked 2 palette. Deep mauve matte color.  


 Top: "Pewter" Lorac Pro Palette. Really a unique purple-y brown color.

Middle: Maybelline Stylish Smokes Quad "Lavender Smokes" Bottom liner color. More purple than Pewter but will fit nice with this look.

Bottom: Maybelline Modern Metallics Quad. "Sunlit Bronze" Bottom liner color. Almost perfect match just a little less brown.


Are you ready to try this look out for yourself? Click here for a video tutorial:


Thursday, November 14, 2013

DIY 21st Birthday Present

The big 2-1 is a huge milestone for many! My boyfriends 21st birthday is coming up this month and like any video gamer he wants the new PS4. But I wanted to get him a little something else as well to give him on his actual birthday. VOILA! I saw this idea on Pinterest and knew it would be perfect. I took a few ideas of my own and put this bad boy together.


Project Cost:
$30-$40

Project Time Estimate:
20-30 minutes


Here's what you'll need:

  • Pot / Bucket (This one is from Old Time Pottery)
  • Styrofoam insert (Dollar store / Old Time Pottery)
  • Tinsel 
  • Decorative swirly pieces (Old Time Pottery)
  • Pipe cleaners
  • Foam sheets (for numbers)
  • Thin sticks (got these from Publix)
  • Hot Glue
  • Mini alcohol bottles  


More of a visual person? Watch this tutorial on how to make it!

Wednesday, November 13, 2013

3 Minute Gel Nails

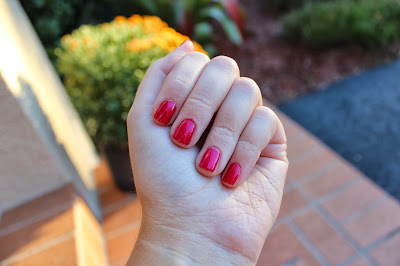
After my favorite Sally Hansen Fast-Dry Topcoat died out on me, I was in the market for a new topcoat.  I've repurchased the Sally Hansen topcoat many times and even though I love it, I wanted to experiment with a few others. That's when this Nail-Aid 3 Minute Artificials caught my eye. I couldn't pass it up for the price! Not to mention, I absolutely love gel nails but going to the salon every two weeks can get time consuming and costly. What did I have to lose?


Here are a picture of my nails before:


Here is after I used the topcoat:


You can see this top coat adds tons of shine, as gel polish does! But 3 minutes?! Not too sure where that comes from. It dries to the touch after about 15-20 minutes. However, I painted my nails and seven hours later when I went to sleep, it still left impressions on my nails. I also experienced chipping as any normal polish so it didn't last for two weeks as my gel polish does.

Overall, this is not something I would repurchase or even keep using. Have you tried this product out--if so, what do you think?